Before starting this task, make sure you are on the stage branch
git branch --show-current
stage
Before starting this section, it might be helpful to close out your file tabs at the top of your VSCode editor from the previous lab task. This is certainly not mandatory but might keep the flow more organized and uncluttered.
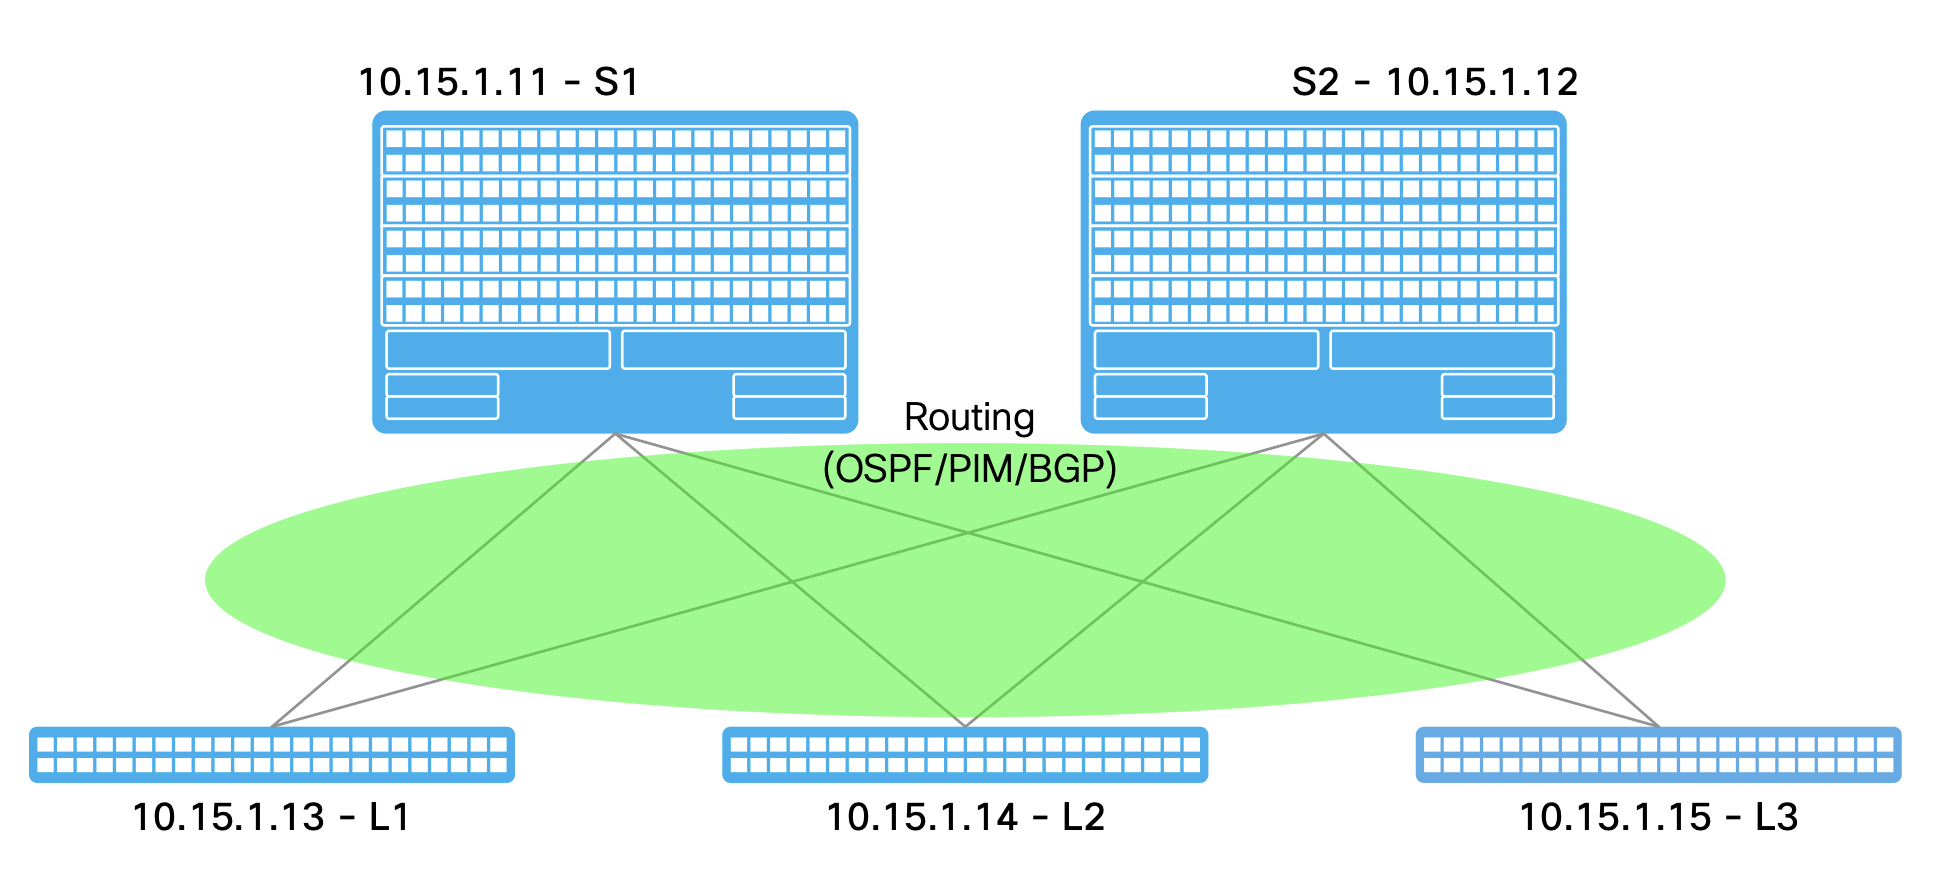
In the previous version of this lab, you built Jinja2 templates and custom Ansible role tasks that called VRF and Network modules directly. In this version, you write the intended state directly into NaC model files. The NaC roles validate the model, translate it into ND intent, and deploy it to the fabric.

The overlay model has two important parts for this lab:
vxlan.overlay.vrfs defines the VRF objects and their fabric attachment group.vxlan.overlay.networks defines the Layer 2 Networks, default gateways, and switch/port attachment group.
The file below creates the vrf_devnet VRF and attaches it to both staging leaf switches using the
all_leaf VRF attachment group.
cat << EOF > ~/workspace/CiscoLive/DEVWKS-3928/host_vars/fabric-stage/vrfs.nac.yaml
---
vxlan:
  overlay:
    vrfs:
      - name: vrf_devnet
        vrf_id: 150001
        vlan_id: 2000
        vrf_attach_group: all_leaf
    vrf_attach_groups:
      - name: all_leaf
        switches:
          - hostname: staging-leaf1
          - hostname: staging-leaf2
EOF
Notice that the attachment group uses switch hostnames. NaC resolves those hostnames against the fabric inventory already managed by ND.
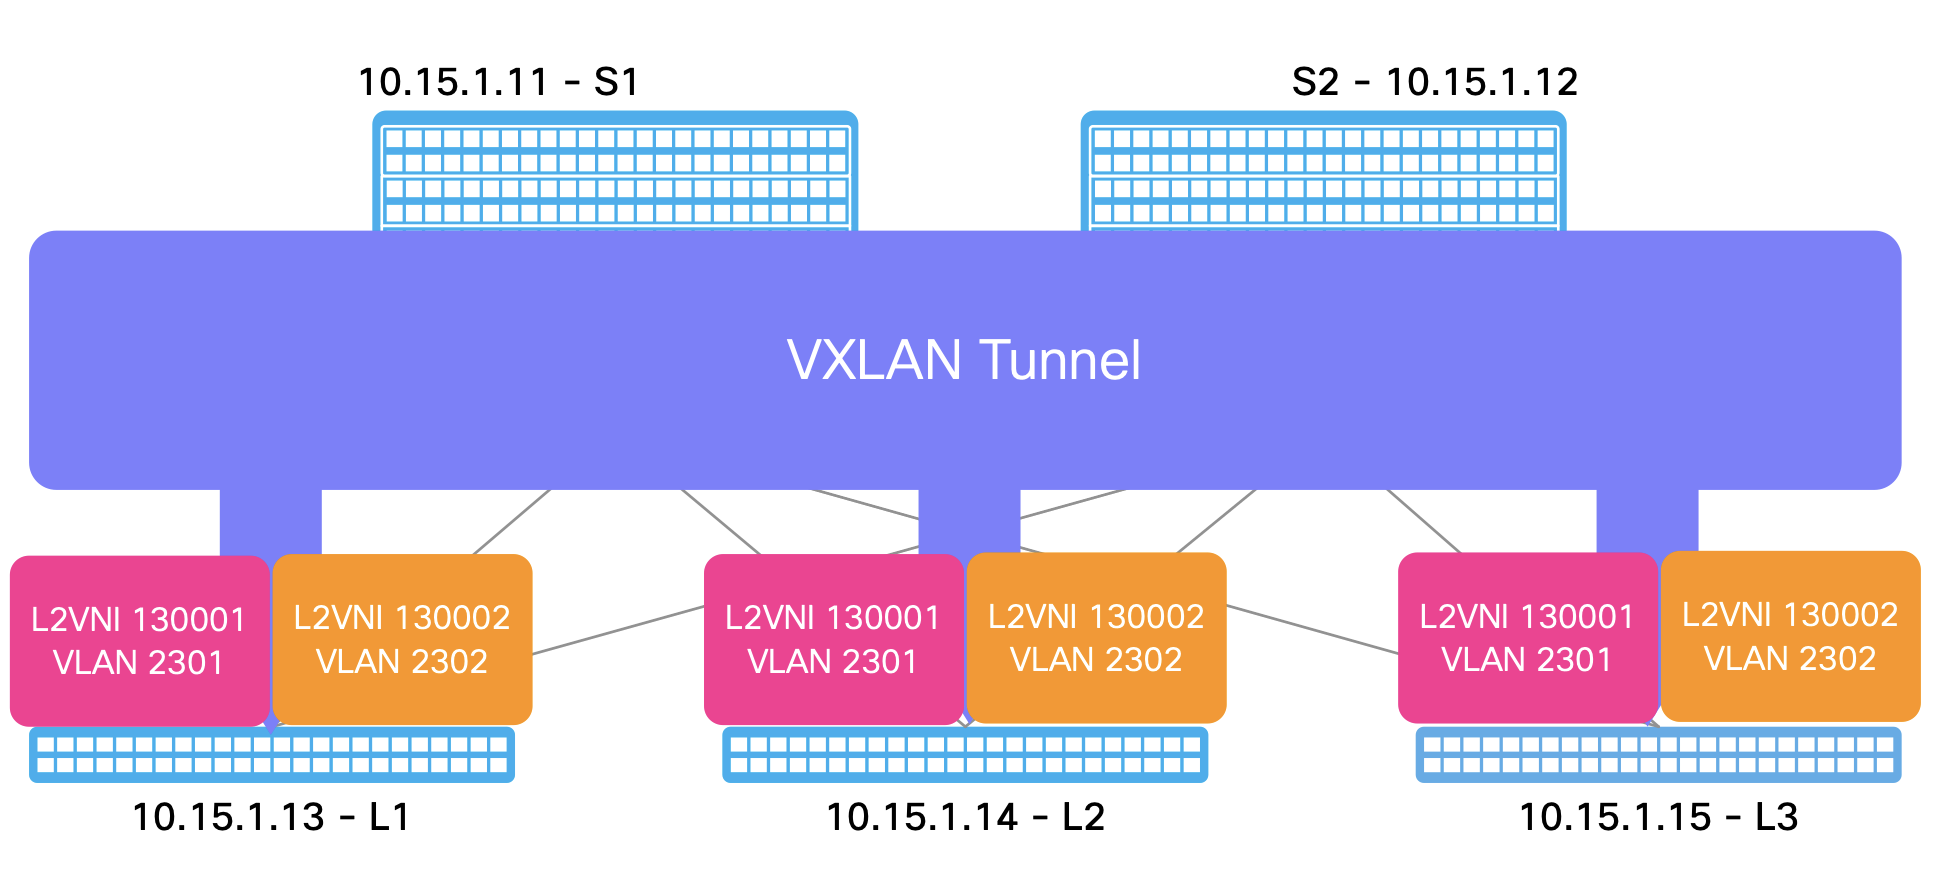
Next, create two Networks in vrf_devnet. Each Network is attached to
Ethernet1/15 on both leaf switches through the esxi Network attachment group.
cat << EOF > ~/workspace/CiscoLive/DEVWKS-3928/host_vars/fabric-stage/networks.nac.yaml
---
vxlan:
  overlay:
    networks:
      - name: network_devnet1
        vrf_name: vrf_devnet
        net_id: 130001
        vlan_id: 2301
        vlan_name: network_devnet1_vlan2301
        gw_ip_address: 10.10.10.1/24
        network_attach_group: esxi
      - name: network_devnet2
        vrf_name: vrf_devnet
        net_id: 130002
        vlan_id: 2302
        vlan_name: network_devnet2_vlan2302
        gw_ip_address: 10.10.11.1/24
        network_attach_group: esxi
    network_attach_groups:
      - name: esxi
        switches:
          - hostname: staging-leaf1
            ports:
              - Ethernet1/15
          - hostname: staging-leaf2
            ports:
              - Ethernet1/15
EOF
The old playbook rendered module input files from Jinja2. With NaC, these YAML files are the source of truth. Adding
or changing overlay intent means editing this model and running the same vxlan.yaml playbook again.